The first time you expand the Application Manager section in the Recast Management Server interface, click Setup to open the initial workflow that will guide you through defining your deployment environment, selecting a distribution point group, and creating a default deployment process.
Prerequisites
Before running the initial setup, make sure the following requirements are in place.
- A Configuration Manager service connection
To add a connection from Recast Management Server to Configuration Manager:
1. Open a browser tab.
2. In your Recast Management Server web portal, navigate to Administration > Service Connections.
3. Add the Service Connection.
4. Test the Service Connection.
5. Open or return to a browser tab that displays the Application Manager Setup Wizard.
6. Refresh the browser page. You should see the new service connection in the list.
- A user account running Recast Proxy
To set up the required permissions for the user account:
1. In your Recast Management Server, navigate to the Task Scheduler.
2. Grant the StartTaskByName permission using the default Administrator role, or by creating a custom role.
Define the deployment environment by choosing a service connection and setting a UNC path for third-party application installation files.
Service Connection
A service connection allows your Recast Management Server to gather data from third-party services.
To use a service connection that already exists in RMS, select it from the drop-down menu. If none are listed, you can add a service connection.
NOTE: Application Manager is currently limited to a single Configuration Manager service connection.
UNC Path
Enter a UNC path as the location where Application Manager will download all third-party application installation files.
NOTE: The Recast Proxy account requires at least Modify permissions for the UNC path folder structure.
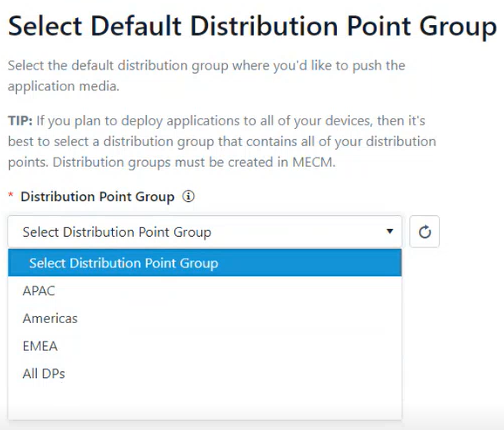
Application Manager targets application content at distribution point groups. If you plan to deploy applications to all of your devices, we recommend choosing a distribution point group that contains all of your distribution points. In larger environments, it's also possible to include only the distribution points used for application media distribution.
Before choosing Application Manager's default Distribution Point Group from the drop-down list, you must already have at least one distribution point group in Configuration Manager, as only distribution point groups that already exist in ConfigMgr will be displayed.
For instructions on creating a distribution point group, see Configuration Manager Setup. Once you've created the distribution point group, return to the Application Manager Setup section in RMS and click the Refresh icon next to the Distribution Point Group drop-down list to see the new DP group.
Deployment processes are key to Application Manager. During the initial Application Manager setup, you'll create deployment processes, each of which defines a set of applications to be deployed to specified collections. A deployment process is made up of one or more individual deployments. Each deployment within a deployment process deploys the same set of applications out to different device or user collections.
The Application Manager Setup Wizard is suitable for organizations where deployment processes are simple and straightforward. To create deployment processes with more advanced settings, we recommend configuring options on the Deployment Processes page rather than via the Setup Wizard.
Create a Deployment Process
Each deployment process consists of applications to deploy and the collection(s) to which the applications will be deployed.
To create a deployment process:
1. On the Define Deployment Processes page, click Add.
2. In the Select Application(s) side panel that opens, search for and select the applications to deploy with this deployment process. Click Next.
3. Name the deployment process and click Next.
4. From the list of collections drawn from your Configuration Manager environment, select the device or user collection to which you'll first deploy the chosen applications. You may, for example, want to start by deploying the applications to a collection of Testing Devices.

5. Click Save & Close to return to the Define Deployment Processes page. The first deployment step will be listed under the deployment process name.
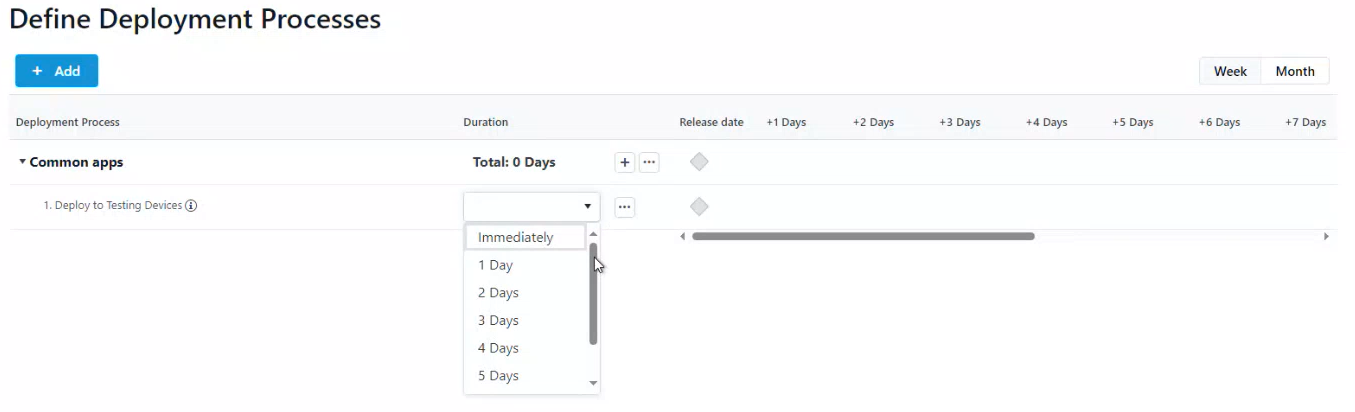
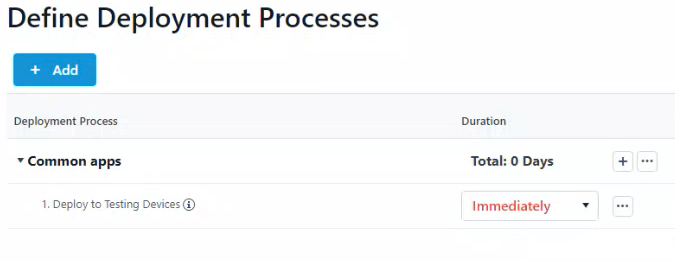
6. Set when the deployment will be forced. You can choose to initiate the installation Immediately or you can give users a grace period of one or more days to manually set their deployment time before the installation is forced.
Deploy the Applications to Another Collection
You can install the same application updates on another collection by adding a deployment step to your deployment process.
To add a deployment:
1. Click the plus sign (+) to the right of the deployment process name. In this example, the deployment process is named Common apps.
 2. In the Add Collection side panel that opens, select the collection to which the applications will deploy next. In this example, the target collection is IT Department Devices.

3. Click Save & Close to return to the Define Deployment Processes page. A second deployment will be listed below the first.
View Deployment Process Duration and Schedule
As you add collections and set the start of each deployment step, the timeline will reflect the Total Process Time and schedule for the deployment process. You can scale the timeline by Week or by Month.
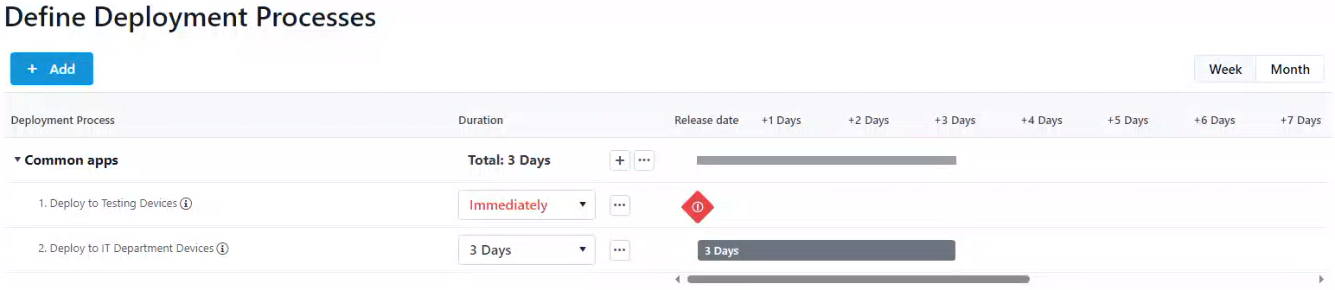
TIP: Hovering over a grey bar on the timeline opens a summary of when the deployment is available, when it will be forced, and the type of user notifications.
Add a Delay Before a Deployment Step
You may want to add extra time ahead of a deployment step to, for example, allow for feedback following the initial test deployment.
To add a delay:
1. Click the ellipsis (...) to the right of a deployment step.
2. Select Add Delay from the drop-down. A Delay days row will appear above the chosen deployment step, meaning that the delay will happen before that step.
3. Select a number of days to delay the next deployment step in the list.
TIP: Hovering over a delay on the timeline opens a summary of delay details.
Edit a Collection
To edit a collection, click the ellipsis (...) to the right of a deployment step and select Edit Collection.
Delete a Deployment Step
To delete a step in the deployment process, click the ellipsis (...) and select Delete Deployment Step.
During the final Review & Submit step, you can see and edit your settings for the deployment environment, distribution point group and deployment processes.
You'll also choose to start the deployment process immediately or initiate it manually at a later time.
- By default, Application Manager starts the deployment processes immediately. Application Manager then automatically detects the release of new application versions.
- You can also choose to create a deployment process and start it manually at a later time. After the deployment is first triggered, Application Manager automatically runs your defined processes whenever a new version is detected.
After clicking Submit, you'll be redirected to the Deployment Processes page.